

Estimated reading time: 14 minutes
Key Takeaways
- A hydroponic tiny home combines compact living with soil-free indoor growing for year-round fresh food production.
- It is especially practical in Canada, where short outdoor growing seasons and long winters make indoor harvests more reliable.
- Best system choices for small spaces usually include DWC, NFT, and vertical towers, depending on footprint, weight, and maintenance needs.
- Hydroponics can improve sustainability by reducing water use, packaging waste, and food miles, though energy use for lighting remains the main tradeoff.
- Most households should start small with leafy greens and herbs, then scale up only after the system is running smoothly.
- Practical success depends on layout planning, electrical safety, humidity control, regular maintenance, and local code checks.
Table of contents
- Why Hydroponic Farming Is Ideal for a Tiny Home and Urban Agriculture in 2026
- Best Hydroponic System Types for a Hydroponic Tiny Home
- How to Plan a Tiny Home Layout for Hydroponic Food Production
- What to Grow in a Hydroponic Tiny Home for Year-Round Food Production
- Sustainability Benefits of a Hydroponic Tiny Home
- Step-by-Step: How to Install Hydroponic Farming in a Tiny Home
- Best 2026 Technology for Automating a Hydroponic Tiny Home
- How to Maintain a Hydroponic Tiny Home and Fix Common Problems
- Costs and ROI of Hydroponic Farming in a Tiny Home
- Tiny Home Codes, Permits, and Practical Rules for Hydroponics in 2026
- Real 2026 Hydroponic Tiny Home Examples
- Best Resources for Building a Hydroponic Tiny Home in 2026
- Hydroponic Tiny Home FAQ
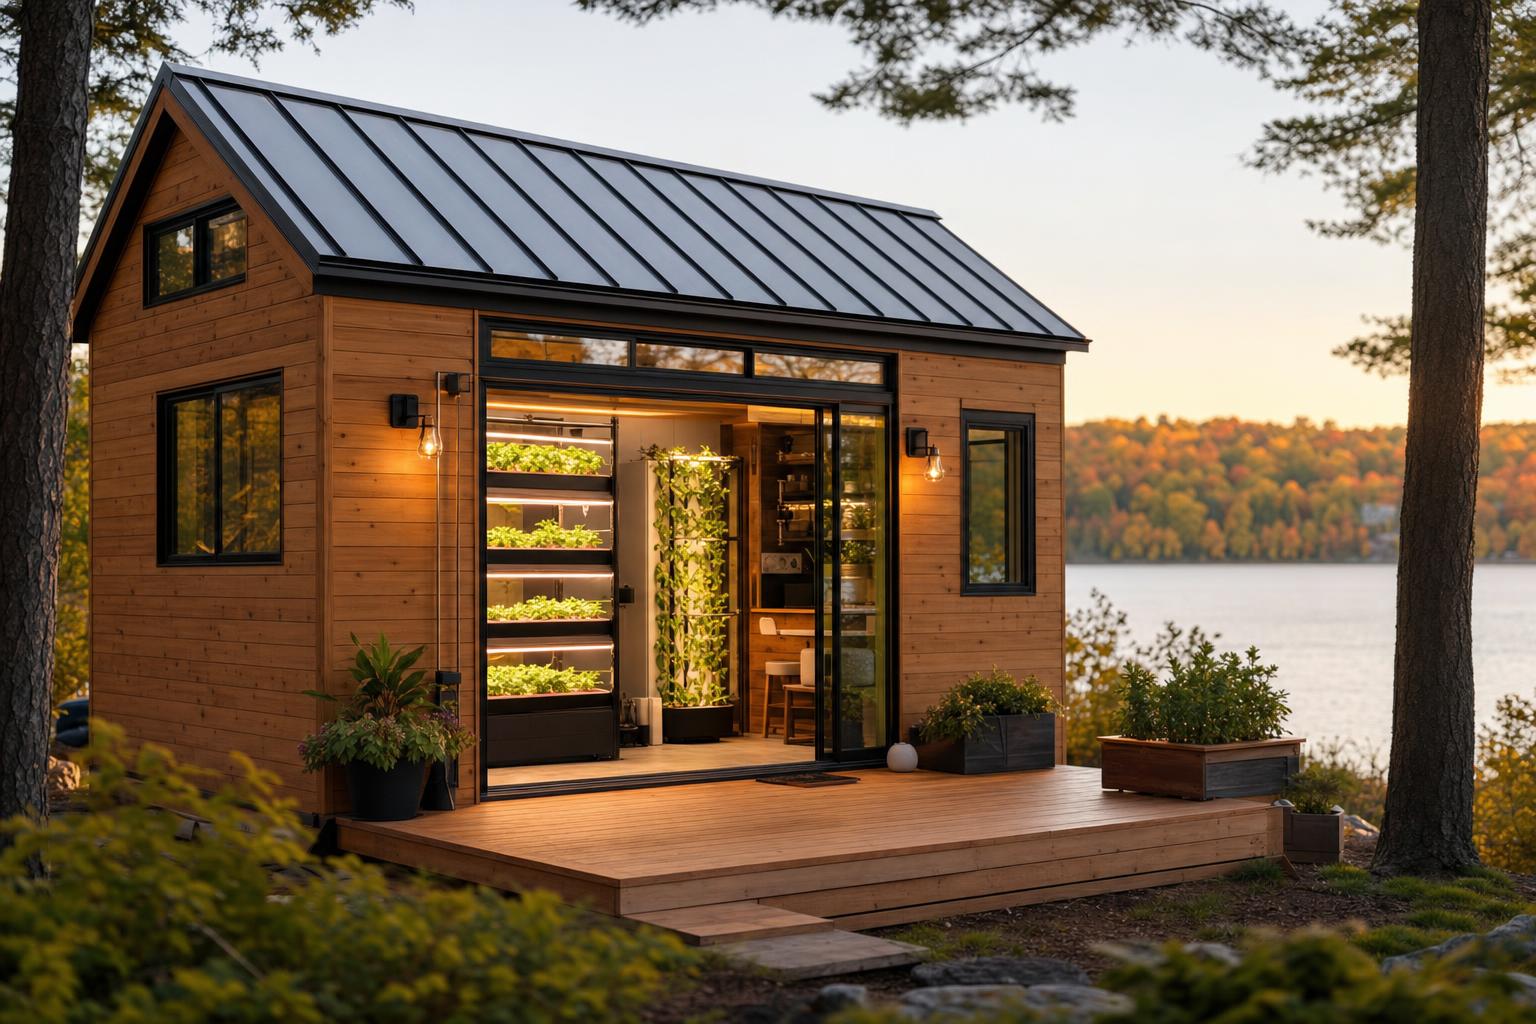
A hydroponic tiny home is a small dwelling designed to include compact, soil-free growing systems so people can grow fresh food all year in a very small space. In simple terms, it turns a tiny home into a practical food production hub through controlled-environment hydroponic farming.
That matters even more in 2026. Grocery prices are still high, weather is less predictable, and more households want resilient urban agriculture solutions that improve everyday sustainability. In Canada, the need is even clearer. Many regions have short outdoor growing seasons, hard winter temperatures, and long periods when fresh produce comes from far away.
Indoor hydroponics helps create more stable harvests in fixed tiny homes, laneway suites, and tiny homes on wheels.
The big idea: a hydroponic tiny home can transform limited living space into a year-round food production engine, especially in Canadian climates with short outdoor growing seasons.
Why Hydroponic Farming Is Ideal for a Tiny Home and Urban Agriculture in 2026
Hydroponic farming means growing plants in water mixed with dissolved nutrients instead of soil. Plants are usually held in a support material like clay pebbles, rockwool, or coco-based plugs, while water moves through a recirculating system.
That makes hydroponics a strong fit for a tiny home because it solves the biggest small-space problems.
Why hydroponics works in a tiny home
- It uses vertical space instead of only floor space
- It is cleaner indoors than soil gardening
- It supports predictable year-round food production
- It gives you more control over light, water, and temperature
- It reduces the mess of dirt, runoff, and soil-borne pests
Hydroponics vs soil in small-space living
In a hydroponic tiny home, wall space and shelves can become growing zones. Soil beds usually need more horizontal area, which is harder to spare in a small dwelling.
Water use is another big win. In a closed-loop setup, water is reused instead of draining away into the ground. NASA notes that hydroponics can use up to 90% less water than conventional agriculture. That makes a strong case for sustainability in homes where every litre matters.
Growth can also be faster for many greens and herbs because roots get steady access to water, oxygen, and nutrients. For indoor use, there is less mess and often a lower risk of bringing soil pests inside.
Why this matters for urban agriculture
Hydroponics supports urban agriculture because it grows food where people actually live.
That can mean:
- shorter supply chains
- less packaging for greens and herbs
- less transport distance
- fresher harvests
- more local food access in dense cities
For Canadians, it also reduces dependence on winter produce shipped long distances. Controlled-environment urban agriculture improves resource efficiency and local production resilience, which is a big reason this model fits 2026 so well.
Sustainability benefits at a glance
A hydroponic tiny home supports sustainability by helping reduce:
- food miles
- single-use produce packaging
- water waste
- seasonal gaps in fresh food access
It will not replace every food need, but it can cover a meaningful share of leafy greens and herbs with far less space than soil gardening.
Sources: NASA hydroponics fact sheet | FAO small-scale urban food production guidance | FAO urban agriculture
Best Hydroponic System Types for a Hydroponic Tiny Home
Before choosing a system, focus on six practical points:
- footprint
- weight
- water volume
- maintenance needs
- power use
- noise
If your tiny home is on wheels, also think about movement, spill risk, and secure mounting. If you want more small-space planning ideas, see our guide to Tiny Home Design: Maximizing Small Spaces in Canada.
Vertical towers
Vertical towers stack planting sites around a central column. Nutrient solution is pumped from a base reservoir to the top and trickles down.
Best for:
- lettuce
- herbs
- strawberries
Main advantage: very small floor footprint
Main drawback: poor light placement can cause uneven growth, and plants can dry fast if the pump stops
NFT systems
NFT stands for Nutrient Film Technique. A thin stream of nutrient solution flows through channels while roots sit partly exposed to air.
Best for:
- lettuce
- basil
- baby greens
Main advantages: efficient, fairly light, and easy to mount along a wall or rack
Main drawbacks: sensitive to pump failure, and roots can clog channels
DWC systems
DWC means Deep Water Culture. Roots hang in oxygenated nutrient solution, usually with an air stone.
Best for:
- herbs
- leafy greens
- some compact fruiting plants
Main advantages: simple, stable, and beginner-friendly
Main drawback: heavier because reservoirs hold more water
Aeroponics
In aeroponics, roots hang in air and are misted with nutrient solution.
Main advantages: lots of oxygen at the roots and strong growth potential
Main drawbacks: more expensive, more technical, and nozzle clogs can stress plants quickly
Ebb and flow
This system uses trays or beds filled with media. The tray is flooded with nutrient solution and then drained.
Main advantages: flexible, forgiving, and supports more crop types
Main drawbacks: more grow media, more bulk, and more weight
Hybrid systems
Hybrid systems combine two approaches. A common example is a small DWC nursery plus NFT rails for greens, or a tower for herbs plus one fruiting crop bucket.
This works well in a hydroponic tiny home because it balances space efficiency and crop variety.
Simple decision guide
- Beginner: choose DWC or a simple vertical tower
- Highest space efficiency: choose a vertical tower or NFT rails
- Low-power or off-grid setup: choose a simple low-pump system
- Tiny home on wheels: choose lower reservoir volume and secure mounting
System comparison table
| System | Best crops | Footprint | Weight | Maintenance | Power needs | Beginner-friendly | Good for mobility |
|---|---|---|---|---|---|---|---|
| Vertical tower | Greens, herbs, strawberries | Very low | Medium | Medium | Medium | Yes | Fair |
| NFT | Lettuce, basil, baby greens | Low | Low | Medium | Medium | Fair | Good |
| DWC | Greens, herbs | Medium | High | Low | Low-Medium | Yes | Fair |
| Aeroponics | Greens, herbs | Low | Low-Medium | High | Medium-High | No | Fair |
| Ebb and flow | Mixed crops | Medium | Medium-High | Medium | Medium | Yes | Fair |
| Hybrid | Mixed crops | Varies | Varies | Medium-High | Varies | Fair | Varies |
If you already have a basics guide on hydroponic farming, this is the right place to link to it.
Sources: Oklahoma State hydroponics overview | Penn State hydroponics systems and nutrition principles
How to Plan a Tiny Home Layout for Hydroponic Food Production
In a hydroponic tiny home, the growing system must fit daily life. It should not block walking paths, reduce safety, or make cleaning hard.
For layout inspiration, it also helps to review broader tiny-space planning resources like Tiny Home Design: Maximizing Small Spaces in Canada and Smart Storage Solutions for Tiny Homes.
Best places to install a system
Good locations include:
- a kitchen wall
- under sturdy cabinets
- a utility wall near plumbing
- near a south-facing window, with grow lights added
- a covered exterior deck for seasonal overflow
Do not rely on window light alone for reliable food production. In Canada, winter daylight is usually not enough.
Avoid putting heavy reservoirs in lofts, especially in mobile homes. Water is heavy, and the higher the weight, the more it can affect safety and balance.
Fixed tiny homes vs tiny homes on wheels
Fixed tiny homes can usually handle:
- heavier reservoirs
- larger wall-mounted racks
- more permanent plumbing and power planning
Tiny homes on wheels need:
- lighter systems
- lower centres of gravity
- secure anchors
- splash control during movement
Three practical layout examples
Minimal layout: 4–6 sq ft
Works for: greens, basil, parsley, chives
Typical setup: one narrow rack or tower, one small reservoir, one LED bar or panel, one spill tray
Good for 1–2 people who want salad greens and herbs.
Balanced layout: 8–12 sq ft
Works for: greens, herbs, one compact fruiting crop zone
Typical setup: wall-mounted NFT rails or a tower, one small nursery shelf, one compact tomato or pepper bucket, separate light zones
This is often the best middle ground for regular household food production.
High-production layout: 20–40 sq ft
Works for: steady greens, herbs, microgreens, one or two fruiting crops
Typical setup: multi-level rack, dedicated nursery area, separate reservoirs, stronger ventilation
This suits people treating their tiny home as a serious year-round growing space.
Layout checklist
- access to a GFCI outlet
- spill containment
- a ventilation path
- room to lift reservoir lids
- room to inspect roots and tubing
- enough clearance to prune and harvest
Visual recommendation
Annotated floorplans work well here, especially for:
- minimal layout
- balanced layout
- high-production layout
A side view that shows vertical stacking also helps explain how a hydroponic tiny home supports sustainability without using much floor area.
Sources: U.S. DOE ventilation guidance | Tiny Home Design: Maximizing Small Spaces in Canada | Smart Storage Solutions for Tiny Homes
What to Grow in a Hydroponic Tiny Home for Year-Round Food Production
The best crops are not always the biggest crops. In a small indoor system, focus on plants that are:
- high value
- quick to harvest
- compact
- reliable indoors
Best beginner crops
Start with:
- lettuce
- basil
- chives
- cilantro
- parsley
- kale
- bok choy
These crops grow fast, stay manageable, and give strong returns for the space they use.
Fast-turn crops
If you want quick wins, grow:
- microgreens
- baby greens
These are ideal for small-space food production because they harvest quickly and have high store prices. For a fuller plan, see Urban Gardening for Tiny Homes, Balconies, Rooftops, and Canada ADUs in 2026.
Moderate-complexity crops
Once your system is stable, try:
- cherry tomatoes
- dwarf peppers
- strawberries
These need better lighting, more support, and closer nutrient control, but they can work well in a hydroponic tiny home.
Less practical crops
These are usually poor fits for a tiny indoor system:
- large vining cucumbers
- root crops
- potatoes
- grains
- calorie staples
Hydroponics in a tiny home is best for fresh produce, not staple calories.
Stagger planting for steady harvests
- sow greens every 1–2 weeks
- start herbs in small batches
- keep a small nursery area if possible
- replace older plants before they decline
Realistic yield expectations
Yield depends on:
- light intensity
- system design
- temperature
- plant variety
- your skill and consistency
A small 4–6 sq ft setup can often cover much of the greens and herbs for a 1–2 person household.
A balanced 8–12 sq ft system can do that plus provide regular tomatoes or peppers if the lights are strong enough.
Conservative scenario
- beginner setup
- lower light
- fewer crop turns
- lighter maintenance
Result: useful greens and herbs, but not full weekly coverage every week.
Optimistic scenario
- tuned system
- strong lighting
- steady monitoring
- good crop timing
Result: frequent harvests of greens and herbs, plus some fruiting crop production.
Crop and yield chart
| Crop | Harvest cycle | Estimated yield per month | Best system |
|---|---|---|---|
| Lettuce | 4–6 weeks | 4–10 heads | NFT, tower, DWC |
| Basil | 4–6 weeks then ongoing cuts | 100–300 g | NFT, DWC, tower |
| Bok choy | 4–5 weeks | 4–8 plants | NFT, DWC |
| Kale | 5–7 weeks then ongoing cuts | 200–500 g | DWC, ebb and flow |
| Microgreens | 7–14 days | 200–600 g | Tray, ebb and flow |
| Cherry tomatoes | 8–12 weeks then ongoing | 0.5–2 kg | DWC, hybrid |
| Dwarf peppers | 10–14 weeks then ongoing | 0.5–1.5 kg | DWC, hybrid |
| Strawberries | Ongoing after establishment | 250–750 g | Tower, hybrid |
The goal is realistic food production, not hype. A hydroponic setup can greatly improve freshness and resilience, but it will not fully feed a household on its own.
Sources: Penn State hydroponics systems and nutrition principles | FAO small-scale urban food production guidance
Sustainability Benefits of a Hydroponic Tiny Home
In this context, sustainability means growing food with fewer resources, less waste, and lower transport impact while still fitting the limits of a tiny home.
If you’re looking to tie this into broader compact-living and low-impact home strategies, related reading includes Tiny Sustainable Living: How Eco-Friendly Homes and Energy-Efficient Design Are Shaping the Future and Building an Eco-Friendly Home: Practical Canadian Strategies for Sustainable and Cost-Effective Living.
Water management
Most hydroponic systems recirculate water. You top up what plants use and what little is lost to evaporation.
That means net water use is usually low compared with many soil methods. This is one of the clearest sustainability strengths of hydroponic farming.
Nutrient management
Two numbers matter most:
- pH: how acidic or alkaline the water is
- EC: how strong the nutrient mix is
If nutrient solution is spent, do not dump it into storm drains. In some cases, it can be reused on outdoor ornamentals or soil beds if appropriate. Responsible handling matters.
Greywater and rainwater
Some people ask about using rainwater or greywater. It may be possible in some places, but only where local rules allow it and where treatment and filtration are adequate.
For most home growers, clean potable water or well-filtered source water is safer and easier. For water-system ideas, see Rainwater Harvesting for Tiny Homes in Canada and Greywater Recycling Tiny Home Plumbing and Water Conservation Guide for Canada 2025.
Energy use
The main environmental tradeoff is energy.
Most of the ongoing footprint comes from:
- LED grow lights
- water pumps
- air pumps
- sensors and controllers
The good news is that modern LEDs in 2026 are far more efficient than older grow lights. They produce more plant-ready light with less heat, which helps both crops and indoor comfort.
Lifecycle impact
A hydroponic tiny home can reduce:
- plastic clamshell waste from herbs and greens
- transport emissions from winter produce
- spoilage from buying more than you can use
The most sustainable setups also use durable, repairable parts rather than disposable kits.
Carbon-footprint reality check
Hydroponics is most likely to improve sustainability when it is used for high-value, perishable crops like herbs, lettuce, baby greens, and strawberries, and when energy use is kept efficient. That is a more honest model than trying to grow everything indoors.
If you have related content on off-grid energy, water systems, or efficient home design, this is the right section to link to your broader sustainability resources.
Sources: NASA hydroponics fact sheet | FAO urban agriculture hub | U.S. DOE solid-state lighting
Step-by-Step: How to Install Hydroponic Farming in a Tiny Home
Hydroponic installation works best when done in a simple order.
Step 1: Assess the space
- measure floor area
- measure wall area
- measure ceiling height
- check clearance for lights and maintenance
Also check for:
- power access
- water access
- drainage options
- nearby heat sources
- ventilation
Step 2: Confirm structural and weight limits
Water is heavy. 1 litre weighs about 1 kilogram.
Place reservoirs:
- low to the floor
- near strong structure
- close to support points
In a tiny home on wheels, place major weight over or near the axle line where possible.
Step 3: Choose a system
Match the system to:
- your skill level
- your budget
- your space
- whether the home moves
For beginners, simple DWC or tower systems are usually best. If you’re comparing utility planning for off-grid or compact homes, see Tiny Home Utilities Canada: Comparing On-Grid vs Off-Grid Systems.
Step 4: Select core components
Starter list:
- reservoir
- pump
- air pump and air stone if needed
- net pots
- grow media
- LED grow lights
- timer or controller
- pH meter
- EC meter
- shelving or mounting hardware
- spill tray or waterproof mat
Step 5: Plan electrical safety
Water and power need careful planning.
Use:
- GFCI outlets
- elevated power connections
- drip loops on cords
- tidy cable routing away from splash zones
Step 6: Build or install
- assemble the rack, rail, or tower
- secure it to the wall or floor
- set the reservoir in a spill-safe spot
- mount lights at the right height
- route tubing cleanly
- check that the return flow drains properly
Step 7: Test before planting
Run plain water for 24 to 48 hours.
Watch for:
- leaks
- pump noise
- poor flow
- overflow risk
- unstable mounting
Step 8: Add nutrients and transplant seedlings
Start with easy crops like lettuce and basil.
Record your baseline:
- pH
- EC
- water temperature
- air temperature
Mini DIY example: 4–8 sq ft starter setup
A simple greens-and-herbs setup can include:
- one 18–24 inch deep rack
- two grow levels
- one 40–80 litre reservoir
- one LED bar per level
- 12 to 24 plant sites
That is enough to begin real food production in a hydroponic tiny home without taking over the whole space.
30-day startup checklist
- Measure and mark the grow zone
- Confirm outlet and GFCI protection
- Buy system and test fit it dry
- Fill and leak-test with plain water
- Add lights and timers
- Mix first nutrient batch
- Transplant seedlings
- Check pH and EC twice a week
- Harvest first herbs or greens
- Record costs and yields
If you have internal content on tiny home electrical or plumbing planning, link it here. For related design and utility articles, see Tiny Home Utilities: The Complete Guide to Utilities for Tiny Home Living in Canada and Utility Hookup for Tiny Homes in Canada.
Sources: Electrical Safety Foundation International GFCI guidance | Oklahoma State hydroponics overview
Best 2026 Technology for Automating a Hydroponic Tiny Home
Automation matters because it lowers daily work and helps prevent crop loss. In a busy home, that makes year-round food production much easier.
For broader smart-home context, see AI in Tiny Homes 2026: Smart Automation Guide and Smart Lighting Solutions Transforming Canadian Tiny Homes and ADUs.
Basic automation
- light timer
- manual pH meter
- manual EC meter
- thermometer
- hygrometer
This level is low-cost and effective.
Mid-tier automation
- smart plugs
- app-connected sensors
- reminder alerts for top-ups and checks
Premium automation
- dosing pumps
- integrated controllers
- pH drift alerts
- pump failure alerts
- high-temperature alerts
What to monitor
- pH: affects nutrient uptake
- EC: shows nutrient strength
- Water temperature: affects root health
- Air temperature and humidity: affect mold risk, plant stress, and comfort
2026 buying guidance
Most people do not need expensive tech at first. Budget systems are enough for a small hydroponic tiny home. Premium automation makes more sense when the system is larger or when the owner travels often.
LEDs are also better in 2026 than they were a few years ago. Look for:
- high efficacy
- low heat output
- bar-style fixtures for vertical systems
- dimming if possible
These improvements support both hydroponic farming and household sustainability by using power more efficiently.
Source: U.S. DOE solid-state lighting hub
How to Maintain a Hydroponic Tiny Home and Fix Common Problems
Hydroponics is not set-and-forget. It is cleaner than soil, but it still needs regular checks.
Weekly maintenance
- top up water
- check pH
- check EC
- inspect roots
- wipe surfaces
- harvest and prune
- inspect for pests
Every 2–4 weeks
- change or refresh nutrient solution
- clean filters
- inspect and clean pumps
- flush lines if needed
Seasonal deep clean
- sanitize channels or buckets
- inspect light fixtures
- replace worn tubing
- check wall anchors and supports
Common problems and fixes
Root rot
Signs: brown or slimy roots, bad smell, wilting even with water present
Causes: warm water, stagnant solution, low oxygen
Fixes: improve aeration, lower water temperature, clean the system, remove damaged roots if needed
Algae
Cause: light hitting nutrient solution
Fix: use opaque reservoirs and tubing, and clean regularly
Nutrient imbalance
Signs: yellow leaves, burnt tips, slow growth
Fix order:
- check pH
- check EC
- review nutrient strength
- replace old solution
Pump failure
This is a serious risk in towers and NFT systems because roots can dry quickly.
Smart move: keep a spare pump and have a quick backup watering plan.
Humidity and mold in a tiny home
Plants release moisture into the air. In a small dwelling, that can raise humidity fast.
Use:
- ventilation
- exhaust fans where suitable
- dehumidification if needed
- a humidity meter
Indoor-friendly pest management
- use sticky traps
- quarantine new plants
- keep the area clean
- remove dead leaves fast
- use low-toxicity treatments carefully around electronics and living areas
Most problems are manageable if you monitor the system consistently. That is one reason simple systems often outperform overly complex ones in a tiny home.
Sources: U.S. DOE ventilation guidance | Penn State hydroponics systems and nutrition principles
Costs and ROI of Hydroponic Farming in a Tiny Home
Costs vary a lot by size, lighting, and automation level. The best way to think about ROI is by setup tier.
Minimal setup: 4–6 sq ft
Typical costs:
- system: $150–$400
- lighting: $120–$300
- pumps, meter, accessories: $100–$250
Estimated startup total: $370–$950 CAD
Best for: greens, herbs, first-time growers
Balanced setup: 8–12 sq ft
Typical costs:
- system: $300–$900
- lighting: $250–$700
- pumps, sensors, accessories: $150–$400
Estimated startup total: $700–$2,000 CAD
Best for: regular greens, herbs, one fruiting crop area
High-production setup: 20–40 sq ft
Typical costs:
- system: $1,000–$3,000
- lighting: $800–$2,500
- pumps, controllers, accessories: $400–$1,500
Estimated startup total: $2,200–$7,000+ CAD
Best for: intensive household food production, serious hobby growers, demonstration or shared urban systems
Ongoing operating costs
Expect regular spending on:
- electricity
- nutrients
- seeds or seedlings
- water
- replacement pumps, tubing, and meters
Cost breakdown table
| Tier | Startup range | Main crops | Monthly operating cost |
|---|---|---|---|
| Minimal | $370–$950 | Greens, herbs | $20–$60 |
| Balanced | $700–$2,000 | Greens, herbs, some fruiting crops | $40–$120 |
| High-production | $2,200–$7,000+ | Mixed crops, nursery, microgreens | $100–$300+ |
Realistic ROI
Direct payback is strongest for:
- basil
- cilantro
- parsley
- lettuce mixes
- microgreens
These are expensive in stores and lose quality quickly after purchase.
A simple annual savings example:
- household buys $15 of herbs and salad greens each week
- system replaces two-thirds of that
- annual gross savings = about $520
That does not guarantee full payback in year one, but it shows how a modest system can offset premium grocery purchases over time.
Non-financial value
- fresher harvests
- better resilience in winter
- convenience
- practical growing skills
- stronger sustainability
How to scale smartly
- start with greens and herbs
- add a nursery shelf
- add one fruiting crop zone
- join local urban agriculture groups
- share surplus where allowed
- consider small co-op or micro-CSA models only if local rules permit
Sources: FAO urban agriculture | ADU house hacking and affordable housing
Tiny Home Codes, Permits, and Practical Rules for Hydroponics in 2026
Rules depend on the type of home.
Tiny homes on wheels
These are often regulated differently from fixed dwellings. Mobility, axle load, electrical safety, and travel security matter more.
Fixed tiny homes and laneway homes
These may fall under local building, plumbing, and electrical code rules, especially if you add permanent wiring, plumbing, drainage, or structural supports.
What may trigger permits
The growing system itself often does not need a permit. But these changes might:
- new electrical circuits
- major plumbing changes
- wall reinforcement
- roof penetrations
- large water tanks
- solar integration
- rainwater or greywater systems
Other practical checks
- strata or HOA rules for visible exterior systems
- local rules for water disposal
- rules for rainwater and greywater reuse
- food sale rules if you sell surplus produce
This section is not legal advice. Before major installation work, check local provincial and municipal requirements. For a hydroponic tiny home, moisture control and ventilation safety are also key practical issues, even when permits are not required. For broader compliance guidance, see Tiny Home Legal Requirements Canada and Canadian ADU Regulations: A Comprehensive Provincial Guide.
Source: U.S. DOE ventilation guidance
Real 2026 Hydroponic Tiny Home Examples
These are representative example scenarios inspired by current 2026 practices.
Case 1: Tiny home on wheels with a 6 sq ft vertical system
- Home type: tiny home on wheels
- Setup type: slim vertical tower
- Space used: 6 sq ft near entry-side utility wall
- Crops: lettuce, basil, strawberries
- Main challenge: secure mounting and water slosh while moving
- Main result: steady herbs and greens for most weeks, with a small reservoir kept low over the axle zone
This setup used low water volume and a seasonal lighting strategy, with higher light use in winter and lighter production in summer. For a related mobility-focused read, see Tiny Home Mobility in 2026: Modular Chassis and Smart Towing.
Case 2: Fixed tiny home with kitchen-wall greens system
- Home type: fixed tiny home
- Setup type: wall-mounted NFT plus nursery shelf
- Space used: 10 sq ft on kitchen wall
- Crops: lettuce, bok choy, basil, parsley, cherry tomatoes
- Main challenge: managing humidity in winter
- Main result: reliable household food production for greens and herbs, plus periodic tomato harvests
The big advantage was convenience. Harvesting near the kitchen made the system easy to use every day.
Case 3: Urban demonstration micro-co-op
- Home type: fixed laneway-style compact dwelling
- Setup type: hybrid rack with greens, herbs, and microgreens
- Space used: 24 sq ft
- Crops: salad mixes, basil, cilantro, microgreens
- Main challenge: keeping maintenance simple for shared use
- Main result: used as a small urban agriculture teaching model with practical lessons in local sustainability
This kind of setup works well for community learning because it shows that local food production can happen even in very small homes.
Source: FAO urban agriculture
Best Resources for Building a Hydroponic Tiny Home in 2026
Use this list as a practical starting point.
Hydroponic equipment and system guidance
Water and sustainability background
Lighting and energy efficiency
Planning topics to review
- compact indoor crop varieties
- pH and EC meters
- tiny home electrical planning
- ventilation and moisture control
- efficient LED fixture sizing
This section is also a good place to link to your own guides on hydroponic farming, urban agriculture, sustainability, and tiny home design. Relevant companion reads include Urban Farming Tiny Homes: Innovative Canadian Design Solutions and Community Gardens Tiny Homes Canada.
Frequently Asked Questions
Can I run hydroponics in a tiny home on wheels?
Yes, but the system must be lighter, lower, and more secure than a fixed-home setup. Focus on low reservoir volume, splash control, and strong anchors.
Vertical towers and slim NFT systems can work well if they are mounted properly and drained safely.
How much produce can I realistically grow in a hydroponic tiny home?
A small setup can often supply a large share of greens and herbs for one or two people. A larger balanced system can also add tomatoes, peppers, or strawberries.
It is realistic for fresh produce support, not full calorie self-sufficiency.
Is hydroponic farming sustainable?
It can be, especially for leafy greens and herbs. Hydroponics usually uses less water and can cut transport and packaging waste.
The main tradeoff is electricity for lights and pumps, so efficient LEDs matter.
How much electricity does a tiny home hydroponic system use?
It depends on the light size, hours used, and number of pumps. Small systems may stay modest, while larger fruiting setups use much more power.
In most cases, lights are the biggest energy cost.
What is the best hydroponic system for beginners?
DWC is often the easiest place to start because it is simple and stable. A basic vertical tower can also work well if the pump is reliable.
Choose a system you can clean and monitor easily.
Can I use rainwater in hydroponics?
Sometimes, but only if it is clean, filtered, and permitted by local rules. Stored rainwater can carry contaminants or unstable mineral levels.
For most people, clean treated water is the safer choice.
Will hydroponics create humidity or mold issues?
It can increase humidity, especially in a small enclosed tiny home. Plants release moisture, and open reservoirs add to that.
Good ventilation, humidity monitoring, and spill control usually keep the problem manageable.
What crops are best for year-round food production?
The best choices are lettuce, basil, bok choy, parsley, cilantro, kale, chives, and microgreens.
After that, you can add cherry tomatoes, dwarf peppers, or strawberries if your lighting is strong enough.
How much does a hydroponic tiny home setup cost?
A starter system may cost a few hundred dollars. A more balanced system often lands around the low four figures. High-production systems can cost several thousand.
The smartest approach is to start small and scale once your first system is working well.
Do I need permits?
Usually not for the plant system alone. But permits may apply if you add wiring, plumbing, structural reinforcement, large tanks, or exterior systems.
Always check local rules before major upgrades. For permitting help, see ADU legal clinic Canada: Where to Get Free Permitting & Zoning Help in 2026.
Start Your Hydroponic Tiny Home in 2026
A hydroponic tiny home is a realistic way to create compact, year-round food production in a small living space. For many Canadian households, it is a practical response to short growing seasons, winter supply limits, and the need for better household sustainability.
The best results come from starting small, choosing simple hydroponic farming systems, and scaling only after you know what fits your home and routine. Done well, this approach supports everyday resilience and brings real value to urban agriculture at the household level.
Simple 4-step action plan
- Assess your space, power, ventilation, and weight limits
- Pick a beginner-friendly system like DWC or a simple tower
- Start with greens and herbs, not heavy fruiting crops
- Track yields, costs, and maintenance for the first 90 days
Leave a Reply