
Backyard Greenhouse for ADU: A 2026 Canadian Guide to Food Security, Permits, Design, and DIY Construction
Estimated reading time: 14 minutes
Key Takeaways
- A backyard greenhouse for ADU can be a practical way to improve food security, extend growing seasons, and support year-round harvesting on Canadian properties.
- Canadian ADUs work especially well with greenhouse setups that support multigenerational living, aging in place, and shared household resilience.
- Before any DIY construction, homeowners should confirm local zoning, setbacks, size limits, and permit requirements using a Canadian ADU regulations guide or their municipality’s building department.
- Canadian climate matters. Snow load, wind, humidity, insulation, ventilation, and orientation all shape whether a greenhouse succeeds or struggles.
- You do not need a massive custom build to start. A modest greenhouse, carefully sited and properly rated, can still deliver meaningful produce savings and better home gardening results.
Table of contents
- Backyard greenhouse for ADU overview
- How it improves food security and home gardening
- Canadian ADUs: permits and rules for greenhouse additions
- Regional climate differences across Canada
- How to choose the best greenhouse placement
- Design principles for year-round performance
- Systems and features for all-season productivity
- Compliance and risk note
- DIY construction steps for a backyard greenhouse in Canada
- Build options and 2026 Canadian cost ranges
- What to grow: planting plan and calendar
- Maintenance and day-to-day operations
- Canadian mini-case studies
- Permits, funding, and incentive opportunities
- Materials and tools checklist
- Visuals and supporting links
- Frequently Asked Questions
Backyard greenhouse for ADU overview
A backyard greenhouse for ADU is one of the smartest ways Canadian homeowners can strengthen household resilience in 2026. With grocery prices staying high and weather becoming less predictable, more people are turning to home gardening, urban homesteading, and a well-planned greenhouse strategy to grow food closer to home.
A greenhouse beside or attached to an ADU does more than extend the season. It can give aging parents, tenants, or adult children easier access to fresh produce, support year-round growing, and make a property more self-reliant. It also pairs naturally with accessible ADU design and multigenerational living.
In simple terms, Canadian ADUs are smaller secondary homes on the same lot as a main house. They may be used for rental income, guest space, aging in place, or family housing. If you want a broader breakdown, it helps to review the types of ADUs in Canada.
A backyard greenhouse for an ADU usually takes one of these forms:
- A standalone greenhouse near the ADU
- An attached greenhouse connected to one wall of the ADU
- A semi-integrated garden structure sharing nearby utilities or sheltered outdoor space
The goal is not just appearance. A greenhouse can increase local production, extend the season, and support practical self-sufficiency through urban farming and small-lot agriculture.
High-level benefits include:
- Better food security
- Longer growing seasons
- More productive herbs, greens, tomatoes, and seedlings
- Lower food miles
- Less packaging waste
- Better winter access for ADU residents if the greenhouse is attached
Important idea: an attached greenhouse can create a small microclimate, making the space warmer and more protected than the open yard. For Canadian winters, that small difference can matter a lot.
For examples of attached structures and cold-climate greenhouse performance, see attached greenhouse examples, this overview on how to choose the best greenhouse, and guidance on growing in the harsh Canadian winter.
How it improves food security and home gardening
Food security benefits
Food security means reliable access to fresh, healthy food. That becomes even more important when supply chains are strained, transport costs rise, or weather disrupts outdoor production.
A backyard greenhouse improves resilience because it protects crops from:
- Frost
- Wind
- Heavy rain
- Short shoulder seasons
That is especially valuable on lots with ADUs. If an aging parent, tenant, or adult child lives in the unit, nearby produce can reduce dependence on grocery stores. In Canadian climates, where outdoor growing seasons can be brief, that protected space has real day-to-day value. For related ideas, see urban gardening solutions for ADUs.
Home gardening benefits
Home gardening includes growing herbs, greens, tomatoes, peppers, seedlings, and some root crops on your own property. A greenhouse helps by:
- Extending the growing season
- Letting you start seedlings earlier
- Improving yields
- Protecting crops from sudden weather swings
The benefits are not only financial. Gardening can be calming, educational, and meaningful for multigenerational households. It also makes it easier to grow high-value crops more steadily instead of relying on a short summer window. You can compare greenhouse styles through resources like best greenhouses for sale in Canada.
Economic and environmental benefits
A greenhouse requires upfront spending, but it may reduce grocery costs over time, especially if your household uses a lot of:
- Greens
- Herbs
- Tomatoes
- Peppers
- Seedling starts
A broad estimate is roughly $500 to $2,000 per year in produce savings, depending on climate, crop choices, and how consistently the greenhouse is used.
There are environmental gains too:
- Fewer food miles
- Less plastic packaging
- Better use of small urban lots
- Potential energy synergies if the structure is attached or close to the ADU
Some buyers also see sustainable backyard upgrades as a plus. That perceived value is never guaranteed, but green features can help market appeal in some areas. For related sustainability thinking, see how to minimize an ADU carbon footprint.
Canadian ADUs: permits and rules for greenhouse additions
Important: Local rules vary widely across Canada. Always check with your municipality before buying materials or starting DIY construction.
Rules for a backyard greenhouse for ADU may involve:
- Zoning
- Setbacks from lot lines
- Height limits
- Lot coverage
- Floor area ratio
- Accessory building rules
- ADU siting rules
For many municipalities, ADUs are allowed at roughly 40 to 60 percent of the primary home’s floor area, but exact limits depend on local regulations. Start with a reliable guide to Canadian ADU regulations.
Example greenhouse placement rules may include:
- Setbacks of about 1 to 4 metres
- Height limits of about 4 to 6 metres
These are examples only, not universal standards.
When a permit may not be needed
A small hobby greenhouse may sometimes be permit-exempt if it is:
- Around 100 to 160 sq ft or less
- Without a permanent foundation
- Without plumbing
- Without electrical service
When a permit is more likely needed
You will likely need permits if the greenhouse includes:
- A concrete slab
- Permanent footings
- Wiring
- Plumbing
- Heating equipment
- A larger size than local exempt limits
Municipal checklist before you build
- Site plan with lot lines, main home, ADU, and greenhouse location
- Elevations and dimensions
- Foundation details
- Structural or snow-load notes
- Utility plan if adding water or power
- Product specifications if using a prefab kit
When to call a pro
Bring in licensed professionals for:
- Electrical wiring
- Water supply or drainage work
- Permanent gas or HVAC heating
- Structural review in heavy snow areas
Snow-load safety is especially important in Canada. In Prairie conditions, loads can reach roughly 4 to 6 kPa, and weak framing can fail. Never assume a low-cost kit is rated for your region without checking. For legal and permit questions, a resource like the ADU legal clinic guide can help.
Regional climate differences across Canada
A greenhouse that works in coastal BC may not survive Prairie winter conditions if it ignores snow, insulation, wind, or humidity. Climate should drive every major design decision.
BC coastal
Milder winters help home gardening, but high humidity can create mold and condensation issues. Focus on:
- Good ventilation
- Moisture control
- Mold prevention
- Careful airflow design
Prairies
This is one of the toughest regions for a backyard greenhouse. Priorities include:
- Strong framing
- Good roof pitch
- Insulation
- Snow shedding
- Better sealing against extreme cold
Ontario and Quebec
Cold, snowy winters mean year-round growing usually needs:
- Robust frames
- Careful air sealing
- Reliable winter heating if growing through deep winter
- Good condensation control
Atlantic Canada
Storms and wind are major design factors. Focus on:
- Anchoring
- Foundation stability
- Wind-resistant siting
- Sheltered placement where possible
The key lesson is simple: climate affects material choice, insulation, orientation, and ventilation needs. If your goal is dependable food production, that cannot be treated as an afterthought. For broader design thinking, see climate-resilient ADU design.
How to choose the best greenhouse placement
Start with the site before you choose the kit.
The best location is usually south-facing, close enough to the ADU for convenience and utility access, but with enough space for airflow and maintenance.
Check these points carefully:
- Sun exposure in every season
- Shadows from the house, ADU, fences, and trees
- Prevailing wind direction
- Slope and drainage
- Distance to water and electricity
- Snow drifting areas
- Winter walking access
Placing the greenhouse near the ADU may help because:
- It can get some wind shelter
- Water and electrical runs may be shorter and cheaper
Simple size guide
- Small: about 8×10 ft for beginners
- Medium: about 10×16 ft for more serious production
- Attached or integrated: connected to the ADU for easier access and microclimate benefits
Try to maintain about 1 to 2 metres of clearance around the structure where possible for drainage, maintenance, and code compliance. Local bylaws may require more.
If ADU residents are seniors or have mobility limitations, plan for:
- Wider doors
- Even walking paths
- Enough space to turn around benches or beds
Accessibility matters here, especially when the greenhouse supports daily use. Related guidance is available through accessible ADU design in Canada.
Design principles for year-round performance
Good greenhouse design is really about one balance: keep useful heat, reduce losses, and avoid overheating.
Passive solar basics
Passive solar design means:
- Capture as much winter sun as possible
- Reduce heat loss on the cold side
- Store warmth during the day
- Release it slowly at night
- Prevent overheating in summer
Orientation
In many layouts, an east-west orientation can improve solar capture. Still, exact placement depends on lot shape, shading, and the greenhouse form.
Thermal mass
Thermal mass refers to materials that absorb heat and release it later. Common examples include:
- Water barrels
- Masonry
- Stone
This helps smooth out temperature swings, especially between sunny days and cold nights.
Glazing choice
Glass
- Clear and attractive
- Heavier
- More fragile
- Usually less insulating
Twin-wall polycarbonate
- Better insulation
- Diffused light
- UV protection
- Often a better fit for Canadian climates
North wall design
In colder regions, an insulated north wall or partial solid wall can reduce heat loss and improve winter performance.
Summer shading
Even in Canada, a greenhouse can overheat quickly. Shade cloth is a simple solution when solar gain becomes too intense. For related passive design ideas, see solar shading strategies.
Systems and features for all-season productivity
Insulation and winter protection
Simple winter upgrades can make a major difference:
- Thermal curtains
- Double glazing
- Insulated north walls
These reduce overnight heat loss and make winter growing more realistic in colder provinces. For more on cold-weather setups, see cold-climate gardening ideas.
Heating options
Use passive solar first, then add only as much heat as necessary.
- Seedling heat mats for propagation
- Electric heaters for simpler code-friendly setups
- Vented propane systems for larger greenhouses
- Heat-sharing or exchanger ideas in attached ADU designs
Avoid unsafe shortcuts. Do not use unvented heating methods, and do not treat a greenhouse like a casual indoor wood-heating space. Safety and air quality matter. If you are exploring broader mechanical options near an ADU, see heat pump guidance for small dwellings.
Ventilation and humidity control
Too much moisture can cause:
- Fungal disease
- Condensation
- Weak plant growth
Useful ventilation tools include:
- Ridge vents
- Side louvers
- Exhaust fans
- Automatic vent openers
Even winter greenhouses need fresh-air exchange. Moisture management also connects to indoor environmental quality, which is why resources like air quality in tiny homes are worth reviewing.
Water systems and irrigation
For efficient home gardening, drip irrigation is often the best option. It uses less water and helps keep leaves drier, which can reduce disease pressure.
Other options include:
- Rain barrels where allowed
- Manual watering for small setups
- Advanced greywater systems only with proper approval
Greywater is more complex and may trigger plumbing or permit requirements. For related water systems, see rainwater harvesting in Canada and greywater recycling for ADUs.
Beds, containers, composting, and intensive growing
Common growing setups include:
- In-ground beds
- Raised beds
- Containers
- Shelving or benches
For beginners, raised beds and containers are often easiest because drainage and soil quality are easier to control.
On compact lots serving ADUs, optional space-saving systems include:
- Vertical growing
- Hydroponics
- Aquaponics
Composting and worm bins can support nutrient cycling if managed cleanly. For ideas connected to small-lot production, see urban farming for tiny homes.
Compliance and risk note
Local codes and permit rules vary. Electrical, plumbing, and heating work should be handled by licensed trades where required. Snow-load and wind-load safety are essential in Canadian climates. Always confirm that the chosen greenhouse is rated for local conditions before starting DIY construction on a backyard greenhouse for ADU.
For snow-related structural planning, review Canadian snow load requirements.
DIY construction steps for a backyard greenhouse in Canada
Many homeowners can handle a basic greenhouse through DIY construction, especially with a prefab kit. But structural shortcuts, unsafe wiring, and code-regulated work should never be improvised. If you are exploring self-build pathways generally, see self-build homes in Canada and this DIY prefabricated ADU kit guide.
1. Pre-build checklist
Before you build:
- Verify bylaws and permit needs
- Confirm size and final placement
- Check local snow-load suitability
- Call utility locators before digging
- Order materials
- Gather tools and safety gear
Typical tools:
- Drill or driver
- Saw
- Level
- Tape measure
- Ladder
- Shovel and rake
- Caulking gun
Safety gear:
- Gloves
- Eye protection
- Hearing protection
- Dust mask if needed
- Proper footwear
2. Week 1: site prep
Clear vegetation, level the area, and make sure water drains away from the future structure. Mark the footprint carefully.
Poor drainage leads to:
- Rot
- Frost trouble
- Muddy winter access
For integrated drainage thinking, see rain garden integration for ADUs.
3. Weeks 1 to 2: foundation
Choose a base that fits your climate, budget, and permit path.
Compacted gravel
- Lower cost
- Good drainage
- Less permanent
Pier footings
- Helpful where frost heave is a concern
- More stable than a loose base
Concrete slab
- Most durable
- Easy to clean
- Usually higher cost
- More likely to require permits
Frost heave means the ground shifts during freeze-thaw cycles. That movement can displace light structures, so foundation planning matters much more in colder regions. Related background: foundation options in Canada.
4. Weeks 3 to 4: framing
Common frame types include:
Aluminum
- Low maintenance
- Common in prefab kits
Timber
- Attractive
- Needs weather durability planning
Steel
- Strong
- Heavier and often more complex
For prefab models, follow manufacturer instructions exactly, especially for anchoring and bracing. The frame must be square, level, and secure if you want reliable snow and wind performance.
5. Weeks 5 to 6: glazing and sealing
If you are using polycarbonate panels:
- Orient them as specified
- Leave proper expansion gaps
- Seal panel ends correctly
- Weatherproof joints carefully
Poor sealing can undermine winter performance even when the frame is solid.
6. Weeks 7 to 8: doors, vents, benches, and electrical rough-in
Plan for easy movement of:
- Trays
- Tools
- Harvest bins
Wider doors are better if accessibility matters. Place vents and benches so airflow remains open.
Electrical rough-in may be needed for:
- Fans
- Lights
- Heat mats
This is often the point where a licensed electrician is required. Accessibility planning also overlaps with broader accessible design principles.
7. Weeks 9 to 12: systems setup and first planting
Finish the working systems:
- Install irrigation
- Test vents
- Add heating if needed
- Place thermal mass
- Set up beds or containers
- Plant the first crops
Before full planting, run a short trial phase. Watch:
- Temperature swings
- Condensation
- Wind movement
- Drainage after rain
8. Safety and code callouts
Do not:
- DIY gas work
- Install non-compliant electrical systems
- Ignore snow-load ratings
- Skip anchoring in windy areas
- Work without proper ladders and PPE
Some parts of a greenhouse build are suitable for homeowners. Others should be completed by licensed trades. Safety guidance for small dwelling projects can also be found in tiny home safety in Canada.
Build options and 2026 Canadian cost ranges
Quick builds
These include hoop houses and light seasonal kits. They are best for beginners testing lower-cost food security improvements.
Typical 2026 cost: $1,000 to $3,000 CAD
Mid-range prefab structures
These are usually polycarbonate kits with stronger frames and better all-season performance. They are a good match for serious home gardening and partial year-round use.
Typical 2026 cost: $3,000 to $10,000 CAD
High-end integrated or attached greenhouse
This is a permanent greenhouse connected to or closely integrated with an ADU. It may include foundation work, utilities, and more advanced climate control.
Typical 2026 cost: $10,000 to $40,000+ CAD
For attached concepts and deeper planning, review this ADU greenhouse guide.
ROI and value
Realistic returns may include:
- Broad produce savings of $500 to $2,000 per year
- Fast value from herbs and greens
- Better resilience
- More convenience
- Better food quality
- Personal satisfaction
Resale value is possible, but it depends on the market and the buyer. For broader property and investment context, see ADU investment in Canada and backyard home value impact.
What to grow: planting plan and calendar for Canadian climates
Choose crops based on:
- Your climate
- Winter light levels
- Heating budget
- What your household actually eats
Reliable greenhouse crops in Canada include:
- Leafy greens
- Herbs
- Tomatoes
- Peppers
- Microgreens
- Seed starts
- Root vegetables in cooler greenhouses
Two simple planning ideas
Succession planting means sowing new crops every 2 to 4 weeks so harvests keep coming.
Crop rotation means changing crop families over time to reduce disease pressure and nutrient issues.
Mini regional calendar
BC Coastal
- Kale
- Basil
- Lettuce
- Herbs
- Milder winter production is easier
Prairies
- Spinach
- Microgreens
- Hardy greens
- Better insulation and some extra heat may be needed
Ontario and Quebec
- Lettuce
- Peppers
- Tomatoes
- Greens
- Strong season extension potential
Atlantic Canada
- Herbs
- Strawberries
- Greens
- Wind-protected placement matters
For small lots with ADUs, vertical growing and shelf propagation can increase output without increasing footprint.
For beginners, seed starting is one of the easiest wins:
- Start seedlings earlier inside the protected structure
- Transplant once temperatures stabilize
- Use the greenhouse to harden off plants before moving some outdoors
For beginner-friendly growing ideas, revisit urban gardening tips.
Maintenance and day-to-day operations
Daily tasks
- Open or monitor vents
- Check temperature
- Inspect moisture
- Water as needed
- Watch for sudden plant stress
Weekly tasks
- Check fertilizer or nutrient routine
- Scout for pests
- Wipe condensation-prone surfaces if needed
- Inspect seals, vents, and irrigation lines
Seasonal tasks
- Winterize the structure
- Clean glazing
- Check anchors and frame connections
- Refresh soil and containers
- Sanitize tools and benches
- Prepare shade systems for summer
Troubleshooting common problems
Overheating
- Add shade cloth
- Improve venting
- Use fans
High humidity
- Increase airflow
- Avoid overwatering
Pests
- Catch them early
- Use greenhouse-safe controls such as neem-based or integrated methods
Fungal disease
- Keep leaves drier
- Improve circulation
For pest planning around small homes and garden spaces, see pest control in Canada.
Canadian mini-case studies
BC attached greenhouse for an ADU household
A family in coastal BC adds an attached greenhouse beside an ADU used by an older parent. The setup creates sheltered winter access, keeps herbs and greens close to the kitchen, and improves food security with less walking in poor weather. Accessibility is a major part of the success.
Prairie DIY retrofit near an ADU
A homeowner installs a 10×12 polycarbonate greenhouse on a gravel base near an ADU. The focus is simple DIY construction, strong anchoring, and season extension in a cold climate. It is modest, but it handles wind better and supports hardy greens well into the shoulder seasons.
Ontario shared family greenhouse
On a multigenerational lot, one greenhouse supports both the main home and the ADU. The family uses shelves, containers, and intensive growing methods to supply greens and herbs for much of the year. The result is steady production and better shared household planning.
Permits, funding, and incentive opportunities to check in 2026
In 2026, it is worth checking for:
- Municipal urban agriculture grants
- Sustainability retrofit programs
- Community food resilience initiatives
- Provincial green-building support
- Housing-related retrofit programs
Some homeowners may also see references to CMHC-style retrofit support or green upgrade programs. These change often, so verify all current programs before relying on them.
Permit applications usually need:
- Site plan
- Elevations
- Structural notes
- Utility notes
- Product specifications
Helpful starting points include ADU grants and municipal incentives, green upgrade financing, federal housing policy context, and tiny-home-friendly municipalities in 2026.
Materials and tools checklist
Materials
- Polycarbonate panels or other glazing
- Frame kit
- Fasteners
- Gravel, pier, or concrete materials
- Vents
- Doors
- Benches
- Irrigation parts
- Sealants
- Thermal mass barrels if used
Tools
- Drill
- Saw
- Level
- Tape measure
- Ladder
- Shovel
- Rake
- Caulking gun
- PPE
Permit checklist
- Lot details
- Setback measurements
- Site plan
- Structural specs
- Utility plan
Timeline checklist
- Week 1: site prep
- Weeks 1 to 2: foundation
- Weeks 3 to 4: framing
- Weeks 5 to 6: glazing
- Weeks 7 to 8: doors, vents, benches, rough-in
- Weeks 9 to 12: systems and planting
Contractor questions
- Is the structure rated for local snow load?
- What warranty is included?
- Are you familiar with local permit rules?
- What electrical or plumbing work requires licensed trades?
Visuals and supporting links
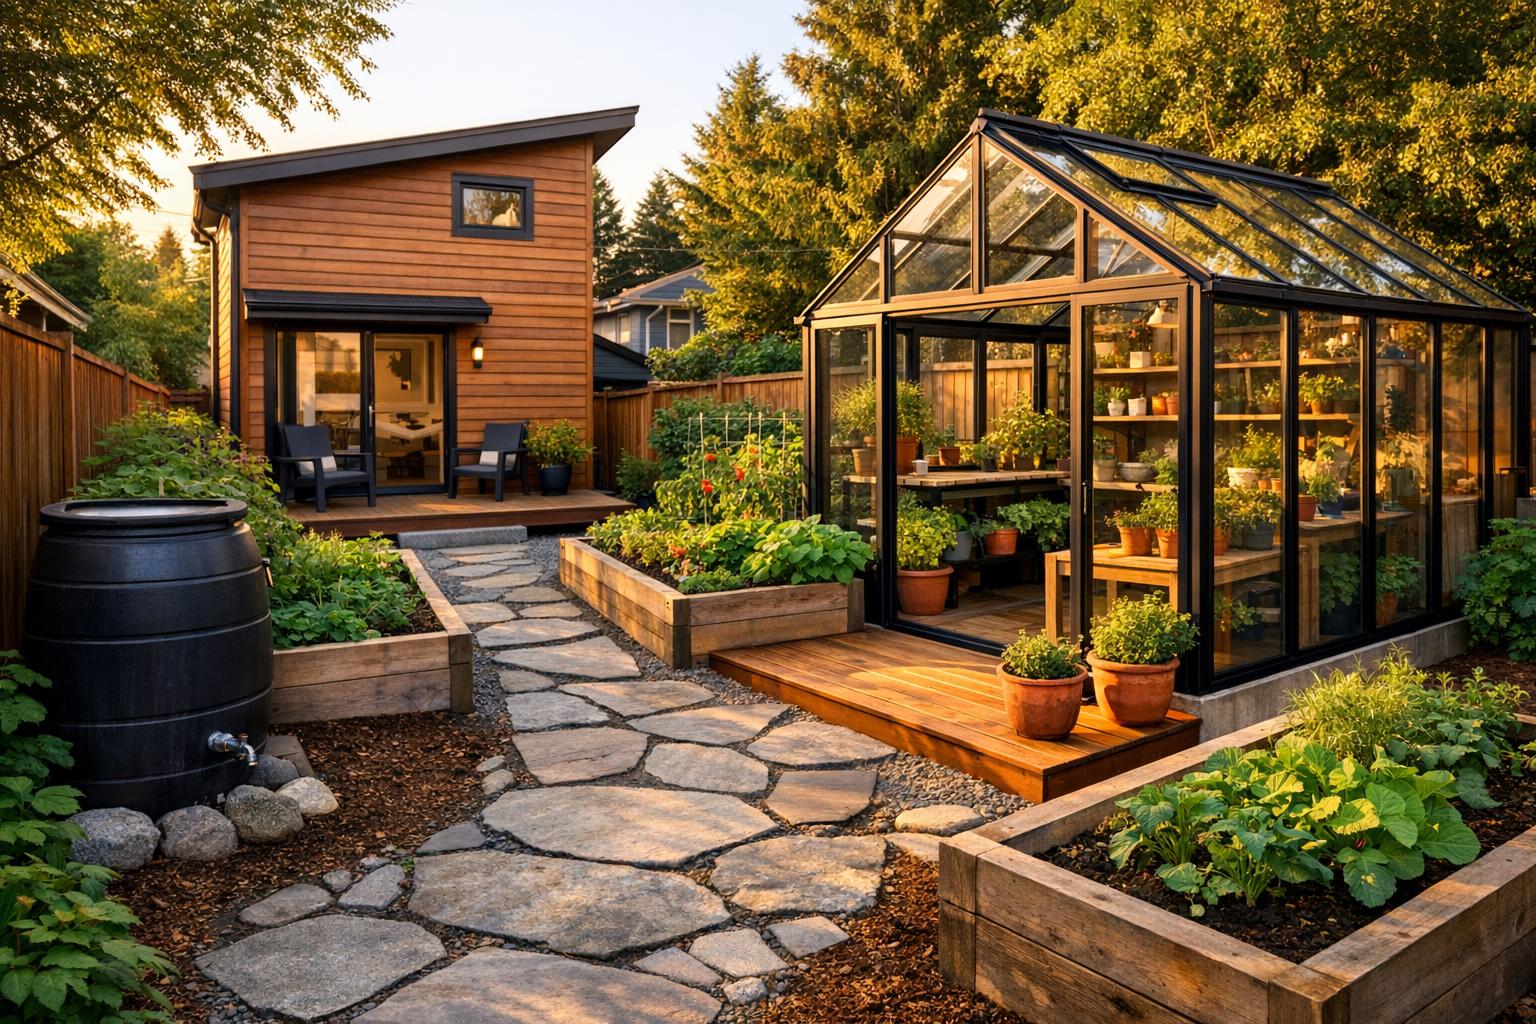
Helpful visuals for this topic include:
- A Canadian ADU with an attached or nearby greenhouse
- A productive greenhouse interior
- A site orientation diagram
- A cross-section showing insulation and thermal mass
- A ventilation diagram with vents and fans
Useful internal supporting links include:
- ADU permits in Canadian cities
- Beginner urban gardening tips
- Energy retrofit guides
- Rainwater harvesting guides
- Raised-bed gardening resources
Useful external references include greenhouse examples, municipal bylaw pages, climate resources, and Canadian manufacturers such as Backyard Discovery greenhouses and BC Greenhouses attached models.
Final thought: a backyard greenhouse for ADU can be one of the most practical ways for Canadian homeowners to improve food security, support year-round home gardening, and make better use of their property in 2026. You do not need to begin with a large custom build. Even a modest greenhouse can deliver worthwhile results if siting, permits, and climate design are handled properly.
The smartest path is usually the simplest one: start small, plan carefully, check local bylaws, choose a realistic size, compare kits and materials, and bring in licensed professionals when safety or code requires it.
Frequently Asked Questions
Do I need a permit for a backyard greenhouse beside an ADU in Canada?
Sometimes yes, sometimes no. Small greenhouses without permanent foundations, plumbing, or electrical service may be exempt in some municipalities, but larger or attached structures often require permits. Always confirm with your local building department.
What is the best material for a Canadian greenhouse?
For many Canadian climates, twin-wall polycarbonate is a strong choice because it offers better insulation than standard glass and is often better suited to cold weather and snow conditions.
Can a greenhouse attached to an ADU help with winter growing?
Yes. An attached greenhouse can create a more sheltered microclimate, reduce exposure to wind, and provide easier winter access for ADU residents. It may also allow more efficient utility connections.
How much does a backyard greenhouse for ADU cost in 2026?
Typical 2026 ranges are about $1,000 to $3,000 CAD for quick builds, $3,000 to $10,000 CAD for stronger prefab models, and $10,000 to $40,000+ CAD for attached or highly integrated greenhouse structures.
What are the easiest crops to start with?
Leafy greens, herbs, microgreens, and seedlings are usually the easiest starting point. They offer quick wins, steady use in the kitchen, and strong value for small greenhouse spaces.
When should I hire a licensed professional?
Hire licensed professionals for electrical wiring, plumbing, gas heating, HVAC work, and any structural review needed for snow or wind loads. Those are the areas where safety and code compliance matter most.
Leave a Reply