
Rooftop Deck Ideas for Tiny Homes, Laneway Houses, and ADUs in Canada (2026 Guide)
Estimated reading time: 14 minutes
Key Takeaways
- A rooftop deck turns unused roof area into practical outdoor living space without increasing the building footprint.
- It is a strong fit for tiny home outdoor living, especially in dense cities where yard space is limited.
- Good design depends on structure, drainage, waterproofing, access, climate response, and local permits.
- A well-planned compact terrace can support dining, lounging, privacy, and even light gardening on small roofs.
- In many Canadian cities, rooftop spaces are becoming more relevant as ADU upgrades and part of modern Canadian urban design.
- Typical 2026 budgets range from about $5,000 to $30,000 CAD for many 100–200 sq ft projects, though complex builds can exceed that.
Table of contents
- Why a rooftop deck matters for tiny home outdoor living
- Compact terrace design principles for small roofs
- Structural and code essentials in Canadian urban design
- Weatherproofing, drainage, and roofing protection
- Best material choices for a compact rooftop deck
- Climate-smart planting for Canadian cities
- Comfort and year-round rooftop deck use
- ADU upgrades — how rooftop decks improve accessory units
- Tiny home-specific rooftop deck constraints and solutions
- Real-life case studies and layout examples
- Rooftop deck budget and timeline in 2026
- DIY vs hiring professionals
- Maintenance and longevity checklist
- Rooftop deck planning checklist for 2026
- Next steps and trusted resources
- Frequently Asked Questions
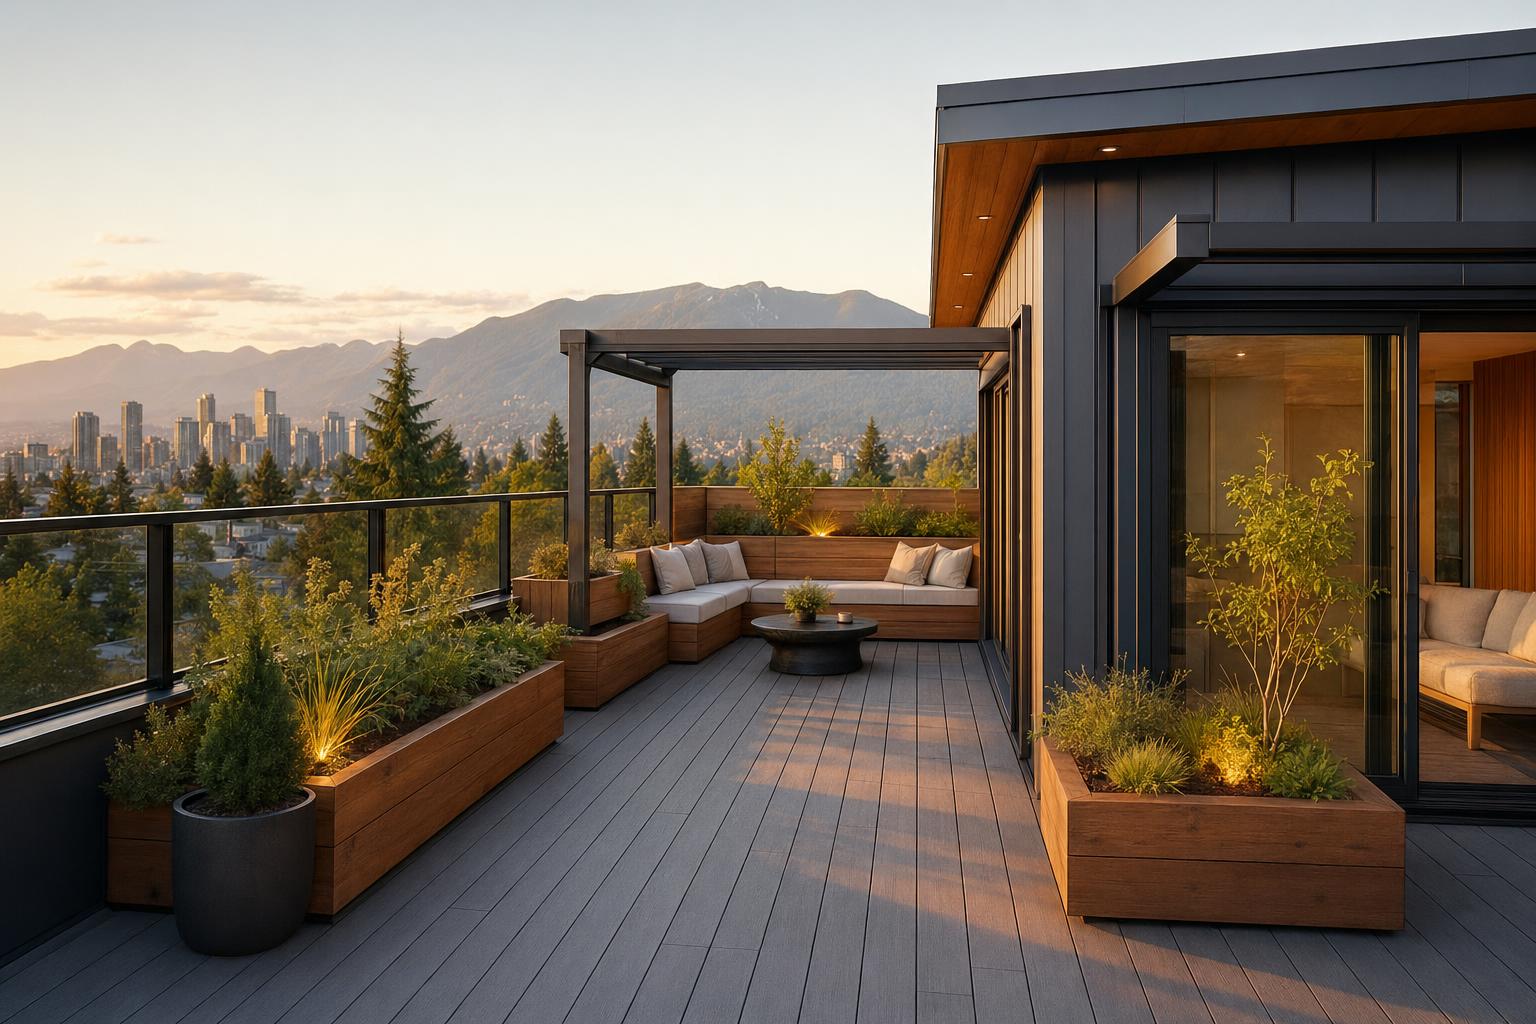
A rooftop deck is a usable outdoor platform built above a tiny home, laneway house, or ADU. It turns roof area into real living space for dining, lounging, gardening, or quiet morning coffee without making the building footprint bigger. For urban owners trying to improve tiny home outdoor living, that extra level can make a small home feel far more complete.
In 2026, this matters more than ever. Housing pressure in Vancouver, Toronto, Montreal, Calgary, and other growing cities is pushing more people toward compact homes, laneway houses, garden suites, and other small infill housing. That shift is a big part of modern Canadian urban design. As lots get tighter, underused roof space becomes valuable. A well-planned compact terrace can add function, privacy, and comfort where ground-level yard space is limited.
This guide covers practical layout ideas, climate and permit basics, roofing and drainage details, material choices, and realistic budgets. It also looks at how rooftop spaces support ADU upgrades and better day-to-day living in small homes. Tiny homes, laneway homes, and ADUs are becoming more important housing solutions in dense cities, and rooftop spaces help maximize those limited footprints. For inspiration, examples from The Tiny Life and roundup concepts from At Home in the Future show why this idea is gaining momentum.
Why a rooftop deck matters for tiny home outdoor living
A rooftop deck can add roughly 100–300 square feet of usable outdoor area. In a small dwelling, that is a major gain. It can become a dining room in summer, a reading spot in spring, or a private perch above a busy lane.
For tiny home outdoor living, the lifestyle benefits are simple:
- more room for meals, coffee, or quiet work
- better privacy than many ground-level patios
- skyline views and a stronger feeling of openness
- better use of small urban lots
Research and design examples from tiny houses with rooftop decks and rooftop deck layouts suggest rooftop outdoor space may improve appeal and boost resale value by around 10–20% in competitive markets. That helps explain why rooftop spaces are showing up more often in Canadian urban design, especially as cities support gentle density through laneway homes, garden suites, and ADUs.
There are trade-offs too. A rooftop deck adds structural load, needs careful waterproofing, usually needs stairs or other access, and often costs about $5,000–$25,000 CAD in simpler projects, with larger or more complex builds going higher. Climate matters as well. Calgary and prairie cities need stronger wind and snow planning. Vancouver projects must pay close attention to rain and drainage, especially with guidance on climate-adaptive decks in Canada and local Canadian snow load requirements.
Permit Quick Tip: Check local bylaws before drawing a final plan. In one Vancouver laneway example, non-habitable rooftop additions may be capped at 10% of roof area.
For British Columbia owners, it is smart to review tiny home permit basics in BC early.
Compact terrace design principles for small roofs
A compact terrace is a small rooftop outdoor area where every square foot needs more than one job. The goal is not to cram in more things. The goal is to make the roof feel calm, open, and useful.
Start by dividing the rooftop deck into clear zones:
- dining zone
- lounging zone
- gardening or privacy zone
On a small roof, circulation matters. Keep walking paths open. Skip oversized furniture. Put heavier visual elements, like benches, tall planters, or privacy screens, near the edges instead of the middle. Use vertical layers to create shelter without making the space feel boxed in.
Smart space-saving picks include:
- foldable dining tables
- stackable stools
- built-in benches with storage
- storage ottomans
- slim planters
- wall-mounted shelves
Vertical features can make tiny home outdoor living feel more private and polished:
- trellises
- green walls
- privacy screens
- planter partitions
Wind needs practical handling too. Slatted screens work well because they soften gusts while still allowing air and views. In very windy areas, fully solid barriers can create more wind pressure unless they are properly engineered. For furniture ideas that suit small accessory homes, see smart furniture for Canadian ADUs and practical tiny home privacy strategies.
Three useful layout templates:
4×8 ft micro-lounge
A two-person bench, a side table, and two planters can fit this layout. Keep 2 ft paths around edges. This works as a quiet reading corner on a tiny home roof or a small ADU roof if the structure allows it.
8×10 ft dining terrace
Use a foldable table, four stools, and a hammock chair. Plan for a central access stair and 3 ft aisles. This layout suits a dining-first compact terrace.
10×15 ft hybrid garden-lounge
This can hold an L-shaped bench, a bistro set, and raised beds. Use U-shaped circulation and keep a 4 ft open centre. It is a strong option for a larger rooftop deck on a fixed tiny home or garden suite. More ADU-specific concepts are covered in rooftop spaces for ADUs.
Structural and code essentials in Canadian urban design
Consult a structural engineer first before pricing furniture, finishes, or planters.
That order matters because a rooftop deck changes a roof from a weather barrier into an occupied outdoor space. Once people start using it, the framing, connections, guardrails, drainage, and access usually get much closer review.
Here are the basic terms in simple language:
- dead load = the permanent weight of the deck itself
- live load = people, furniture, planters, and movable items
- snow load = snow and ice weight on the roof
High-level guidance from the research includes:
- roof dead load minimum around 0.5 kPa
- snow load around 1.4–3.0 kPa by zone
- Toronto example around 2.4 kPa
- live load around 1.9 kPa
- guardrails at 42 inches
- parapets at 1.07 m
These are not design instructions on their own. They are starting points. Final numbers must be checked against local engineering and code requirements, including National Building Code of Canada (NBCC) Part 9 where it applies.
Municipal rules also vary:
- Vancouver may require engineer-stamped drawings for laneway structures
- Toronto may require 1.2 m setbacks
- Montreal often places more focus on wind design
- Calgary may involve frost-heave checks depending on supports and site details
For ADU upgrades, rooftop use can also trigger occupancy review, fire separation concerns, and extra scrutiny if the deck sits above living space. An enclosed rooftop room usually creates a bigger code shift than an open deck. Helpful references include ADU permitting in British Columbia, ADU legal guidance in Canada, and broader planning for climate-resilient ADUs.
Permit-prep checklist:
- roof truss drawings or framing details
- structural load calculations
- engineer report
- drainage plan
- stair or access details
- neighbour notification if required
Always verify through the city portal and local permit office before finalizing a design.
Weatherproofing, drainage, and roofing protection
The most important hidden part of any rooftop deck is not the finish you see. It is the waterproof layer underneath.
A strong roof-deck assembly usually includes:
- a waterproof membrane such as TPO or EPDM
- a protection layer above the membrane
- a pedestal or sleeper system that lifts the walking surface off the roof
- drainage channels that let rain and melting snow move freely
Roofs should maintain about a 2% slope to scuppers so water can drain properly. That is critical in wet climates and during freeze-thaw cycles.
Pedestal systems are useful because they:
- reduce direct wear on the membrane
- help level the finished surface
- let water move below pavers or deck tiles
For lighter structures used in tiny home outdoor living or smaller ADU upgrades, lightweight pedestal systems can keep added dead load under roughly 20 kg/sq m. That makes them attractive where every kilogram matters. Guidance on climate-adaptive deck assemblies is especially useful here.
Insulation matters too. In cold zones, the research notes R-20 below-deck roof insulation as a useful planning point, though final thermal design should always be checked locally.
For snow and ice, keep drains and scuppers easy to find and easy to clear. Avoid details that trap water around railing posts, wall joints, or corners. Good drainage is what protects the roof long after the project is finished. Related water-management thinking can also be seen in greywater solutions for tiny homes, where water handling is treated as a system, not an afterthought.
Best material choices for a compact rooftop deck
Choosing materials for a rooftop deck means balancing look, weight, maintenance, and cost. For a small compact terrace, the best material is often the one that protects the roof well and keeps weight under control.
Composite decking
- Pros: low maintenance, rot-resistant, even appearance
- Cons: higher upfront cost, may get hot in strong sun
- 2026 cost: $50–80 per sq ft
Cedar or pressure-treated wood
- Pros: natural look, DIY-friendly, lighter visual feel
- Cons: needs sealing or staining, can weather faster
- 2026 cost: $30–50 per sq ft
Aluminum or porcelain pavers on pedestals
- Pros: lightweight options available, adjustable, drains well
- Cons: some finishes can be slippery when wet, often pricier
- 2026 cost: $60–100 per sq ft
Engineered wood joists
- Pros: strong and fairly light
- Cons: may need custom specification or fabrication
- 2026 cost: $40–70 per sq ft
Railing and screen choices shape both style and safety:
- cable rails for cleaner views
- glass rails for modern Canadian urban design
- wood slat screens for warmth and privacy
- metal railings for long-term durability
For planters, choose lighter options like:
- fibreglass
- resin
- lightweight soil mixes
There is also room for more sustainable picks, such as reclaimed cedar, low-VOC finishes, and solar-ready benches or integrated lighting. Material research can start with eco-friendly building materials in Canada and sustainable flooring for tiny homes.
Lightweight Material Recommendation: pedestal porcelain is a strong option for many ADU upgrades because it sits above the membrane and helps support drainage.
Climate-smart planting for Canadian cities
Planting can make a roof feel softer, quieter, and more private. But on a roof, plants must be chosen for weight, wind exposure, and winter survival.
Regional ideas:
Coastal BC and Vancouver
- compact evergreens like juniper
- ornamental grasses
- fibreglass planters
- lightweight peat-perlite style mixes
Southern Ontario and Toronto
- native perennials like echinacea
- sedum layers for stormwater help and insulation value
Prairies and Calgary
- hardy shrubs such as potentilla
- drip irrigation where possible
- plants that handle drying winds and temperature swings
A low-profile sedum system can also support stormwater control and add modest insulation. The research notes about an R-5 insulation benefit for some low-profile sedum systems.
Practical planting rules for a compact terrace:
- use lightweight soil mixes
- avoid oversized wet soil loads unless engineered
- place planter clusters where support is strongest
- winterize with mulch and protected containers
Done well, planting improves comfort and privacy without taking too much floor space. That makes it especially useful in tiny home outdoor living and small-scale Canadian urban design projects. For city-friendly planting ideas, review urban gardening tips, ADU rooftop gardens in Canada, and rain garden integration for ADUs.
Comfort and year-round rooftop deck use
A small roof only becomes truly useful if it stays comfortable in shoulder seasons and manageable in winter.
Wind comfort tools include:
- pergolas where allowed and structurally supported
- glass screens for openness
- slatted screens for gust reduction
- evergreen planter buffers
For heat and light, the research points to infrared heaters of about 1–2 kW for 100 sq ft. LED strips work well for both mood lighting and task lighting. Motion sensors are especially useful at stairs and access points.
Winter use needs care:
- remove snow with plastic shovels
- clear drains and scuppers first
- avoid overloading the roof with more than about 1 ft accumulation
- do not hack at ice on the membrane
- limit salt use to protect finishes and the roof below
Winter Care for Rooftop Decks: Always use roof-safe methods and avoid metal shovels.
Cold-season upkeep is easier when paired with a broader Canadian tiny home winterization checklist.
ADU upgrades — how rooftop decks improve accessory units
ADU upgrades are improvements that make garden suites, laneway homes, and other accessory dwellings more livable, more useful, and often more appealing to renters or buyers.
A rooftop deck is one of the most effective upgrades because it makes a small unit feel larger without expanding enclosed floor area. Research suggests rooftop outdoor space may improve rental appeal by around 15–25% in some markets.
This works especially well for:
- narrow urban lots with little yard space
- ADUs boxed in by fences or nearby buildings
- units where privacy is easier to achieve above grade
Planning details matter. Route lighting, power, or outdoor kitchen lines carefully. Use acoustic and privacy screens to reduce neighbour impact. Think about stair placement early so access does not eat too much interior space. Also be clear about the difference between an open deck and an enclosed rooftop room. The second option can create bigger permit and occupancy issues.
One strong research example describes a Toronto ADU using stair-integrated planters. That move combines access and landscaping without wasting floor area. It is a smart model for compact, design-led ADU upgrades within dense Canadian urban design settings. For owners comparing value and financing, see ADU green upgrades financing and the ADU investment guide for Canada.
Tiny home-specific rooftop deck constraints and solutions
Not every tiny home can carry a rooftop deck safely. The first question is whether the home is fixed or mobile.
Tiny homes on permanent foundations
These can often support more permanent deck assemblies. Built-in benches, fixed planters, and integrated stairs are more realistic. Drainage details can also be handled more elegantly.
Trailer-based or mobile tiny homes
These need far more caution. The research notes that some trailer units may need welded steel columns tied to the trailer frame to resist wind uplift and carry loads properly. Roof framing alone may not be enough.
This matters because:
- movement during travel can stress connections
- roof finishes may crack or loosen
- load paths must be carried into the trailer frame
- travel height rules can affect railing design
Possible solutions include:
- folding railings to stay under about 4.3 m travel height where needed
- modular or demountable deck systems
- lightweight furniture and planters
- exterior ladders or hatch access where suitable
A simple comparison helps. One trailer-based tiny home may use a travel-ready fold-down system with removable furniture. A fixed laneway tiny home can use a permanent compact terrace with cable rails, modular planters, and built-in seating.
That is why structural review comes first. Good tiny home outdoor living starts with knowing what the home can safely carry. More context is available in this tiny home on wheels comparison and guidance on tiny home mobility.
Real-life case studies and layout examples
These examples show realistic footprints, material choices, permit paths, and outcomes that urban Canadians can adapt for their own rooftop deck, compact terrace, and ADU upgrades planning.
Case Study A: Vancouver laneway tiny home rooftop deck
This project turned a plain flat roof on a 200 sq ft ADU / laneway home into a 120 sq ft compact terrace. The build used composite decking, cable rails, and cedar planters. Total cost was about $12,000 CAD, and the full process took about 8 weeks including permits and construction.
Key lessons:
- a pedestal system improved drainage
- a green wall hid utilities and added privacy
- the roof changed from dead space into a private outdoor room
For tiny home outdoor living, the biggest gain was simple usability. Before, the roof did nothing. After, it became a lounge area that made the whole dwelling feel larger and more polished within a dense Canadian urban design setting. Supporting context can be found in backyard home value in Canada and the urban infill guide.
Case Study B: Toronto ADU rooftop dining terrace
This Toronto project created a 100 sq ft rooftop deck with a green wall and spiral stair. It used porcelain pavers and glass screens, with a total cost of about $18,000 CAD. Engineer-reviewed snow load calculations and drawings helped support the permit process.
The result was practical as well as attractive. Rental value increased by about $300 per month.
Design lessons:
- dining-focused layouts work best when furniture folds or stacks
- vertical greenery softens privacy screens on tight lots
This is a strong example of how ADU upgrades can improve both use and value when every element of the compact terrace has a clear purpose. For resale context, see ADU resale and Canadian property value.
Case Study C: Calgary prairie winterized rooftop deck
This 150 sq ft Calgary deck used aluminum framing, slatted wind screens, and heaters. Total cost was about $15,000 CAD. The structure was engineered for 3 kPa snow load.
The main lesson was climate-first design. In prairie conditions, wind control and snow planning mattered more than decorative extras. The space became usable across more of the year because screening and heating were designed from the start, not added later.
This project shows how a rooftop deck in western Canadian urban design must respond to weather before style. Related cold-weather design thinking appears in cold-climate homes in northern Canada and climate-adaptive decks.
Across these examples, three layout diagrams are especially useful to compare during planning:
- micro-lounge
- dining for 4
- hybrid garden-lounge
Rooftop deck budget and timeline in 2026
In 2026, rooftop deck pricing depends most on structure, waterproofing complexity, access, and finish level.
Typical budget bands:
- Low / DIY lightweight kit: $40–60 per sq ft
- Mid-range professional install: $80–120 per sq ft
- High-end / structural upgrade + built-ins: $150+ per sq ft
For a 100–200 sq ft project, many owners spend about $5,000–$30,000 CAD, though costs can rise further if engineering, utilities, or complex access are involved.
Typical timelines:
- design and permits: 4–12 weeks
- construction: 1–6 weeks
Common cost escalators include:
- structural reinforcement: about +20%
- utilities: about +15%
- custom railings
- premium finishes
- difficult material access
The key point is simple: the cheapest surface material is not always the cheapest total project. If waterproofing or structure needs work, that is where the budget can move quickly.
DIY vs hiring professionals
DIY can work for very small projects, especially under about 50 sq ft, where the system is lightweight, the roof membrane stays untouched, and local rules allow simple work. In many cases, DIY is best treated as a finish-level approach.
Professionals are essential when the project includes:
- structural reinforcement
- changes to membrane details
- stairs or access structures
- engineered guardrails
- larger ADU upgrades
The team may include:
- structural engineer
- roofer with deck-over-roof experience
- licensed contractor
- landscape designer
Research suggests an engineer may cost about $1,000–$2,000, with contractor and roofer pricing increasing from there based on scope.
For a safe rooftop deck, DIY should never replace structural and waterproofing expertise.
Maintenance and longevity checklist
A rooftop deck lasts longer when both the visible finish and the hidden roof assembly are maintained.
Seasonal checklist:
Spring
- inspect membrane edges
- check flashings
- re-level pedestals
- inspect railings
Summer
- clear debris from drains and scuppers
- wash surfaces
- monitor planters and irrigation
Autumn
- remove leaves
- protect drains before freeze-thaw season
- store soft furnishings
Winter
- clear snow carefully
- protect the membrane
- watch for ice backup
Material-specific care:
- wood: seal or stain as needed
- composite: wash regularly and check expansion gaps
- metal hardware: inspect for corrosion
- planters: refresh lightweight soil and keep drainage holes open
Lifespan cues from the research suggest composites can last around 10–20 years, while cedar may last around 15 years depending on exposure and upkeep. Limit salt use and always choose roof-safe snow tools. Good maintenance protects both the deck and the tiny home outdoor living value it adds. See also the ADU maintenance checklist and guidance on tiny home warranty considerations in Canada.
Rooftop deck planning checklist for 2026
A practical Rooftop Deck Planning Checklist (2026) should cover the questions that matter before materials are chosen.
It should include:
- permit questions for the city
- structural questions for an engineer
- waterproofing and drainage prompts
- materials comparison notes
- furniture sizing cheat-sheet
Checklist link: Download here – placeholder for PDF
For most owners, the smartest next planning step is to review the roof with a structural engineer, contractor, or design professional before locking in finishes. That is especially true for ADU upgrades and more ambitious tiny home outdoor living projects.
Next steps and trusted resources
If you are deciding whether a rooftop deck is realistic, start with three checks:
- local permit office
- structural engineer
- qualified roofer or contractor
For Canadian urban design projects, it also helps to review city-specific rules through Vancouver, Toronto, Montreal, and Calgary permit resources, along with NBCC code context and Canada plant hardiness information.
Related planning topics often include:
A good rooftop project in 2026 starts with structure, drainage, and bylaws. Once those are clear, the right compact terrace layout, material palette, and access plan become much easier to choose.
Frequently Asked Questions
How much does a rooftop deck cost for a tiny home or ADU in Canada in 2026?
Many projects fall between $5,000 and $30,000 CAD, depending on size, structural upgrades, access, waterproofing complexity, and finish level. Simple lightweight systems cost less, while engineered builds with stairs, screens, and custom railings cost more.
Do I need a permit for a rooftop deck on a laneway house or ADU?
Usually, yes. Permit needs vary by city, but rooftop decks commonly trigger review for structure, drainage, guardrails, setbacks, and access. Always confirm with the local permit office before finalizing plans.
Can any tiny home support a rooftop deck?
No. Some fixed tiny homes on foundations may be suitable, but trailer-based homes need extra caution. A structural engineer should verify load paths, uplift resistance, and framing capacity before any deck is added.
What is the best material for a compact rooftop deck?
That depends on weight limits and maintenance goals. Porcelain pavers on pedestals, composite decking, and certain lightweight aluminum systems are often strong choices because they support drainage and reduce roof wear.
How do I protect the roof under a rooftop deck?
Use a proper waterproof membrane, a protection layer, and a deck system that lifts the walking surface off the roof. Maintain drainage paths, preserve slope to scuppers, and avoid details that trap water around posts or corners.
Are rooftop decks worth it for ADU upgrades?
Often, yes. They can make a small unit feel much larger, improve privacy, add outdoor function, and increase rental or resale appeal in tight urban markets. The biggest gains usually come when the design is structurally sound and climate-appropriate.
Leave a Reply